Copy text vs copy media (Pro)
The Copy flow offers two reliable export modes:
- Copy text: best for writing, specs, notes, or code.
- Copy media (Pro): copies a single compiled visual bundle to the clipboard as one image.
Use them as separate clipboard actions. This is more reliable than trying to copy text and media in one mixed clipboard payload, because different destinations paste mixed payloads differently.
How media handling works
When you choose Copy media, Smart Context compiles supported visuals into a single image so you can paste the visual context into tools that accept images.
What this means in practice:
- Images embedded in your notes are included in the compiled image.
- PDFs referenced/embedded in your notes are exported as visual pages.
- The compiled image is labeled with source filenames and PDF page numbers so visuals stay attributable.
- The clipboard receives the compiled media image only.
- If you also need text context, use Copy text and paste the text separately.
Media inclusion rules
- Embeds in the starting note are included at Depth 0.
- Linked attachments are included when they are within the selected link depth.
- The copy confirmation media count is a quick sanity check that media attachments were picked up.
"Copy media" is meant for tools that accept pasted images.
If your target tool is text-only, use Copy text.
Copy media (Pro)
Copy media is for the cases where the "why" lives in the visuals:
- screenshots of UI state
- diagrams / whiteboards
- PDF tables / charts / figures
- slide snapshots
Instead of pasting a bunch of separate images and hoping you did not miss one, Smart Context compiles the relevant visuals into a single image and puts that image on your clipboard.
If you also need the text context, run Copy text and paste the text separately. Smart Context intentionally keeps text copy and media copy separate for more predictable paste behavior.
The recording above shows the media-copy loop end-to-end.
1) Prepare the note (make the media reachable)
Put the media you want the model to see inside your context graph:
- Add links or embeds to your images and PDFs in the note(s) you plan to copy.
- If you want a visual included even at Depth 0, embed it in the starting note (example:
![[some-image.png]]). - If your note only links to attachments (not embeds), you will typically include them by choosing Depth 1 (one hop from the note to the linked files).
Practical pattern: add an "Attachments" section near the top of your note and put the key images/PDFs there, so you can quickly sanity-check what will be included.
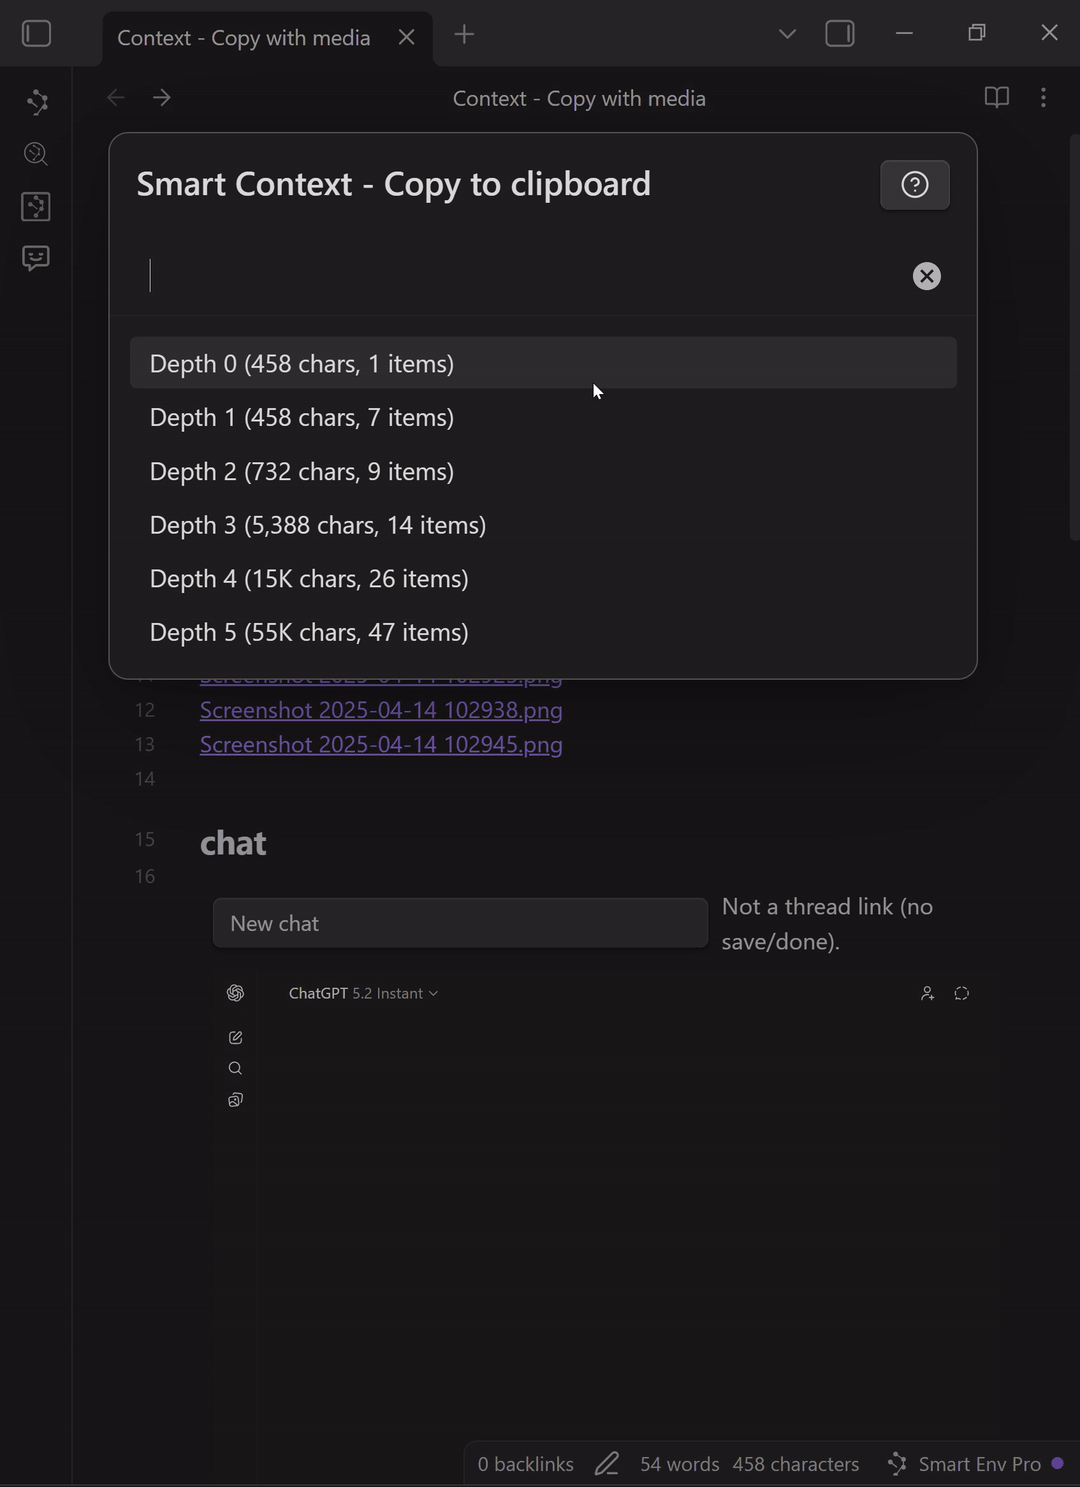
2) Copy media
- Run Smart Context: Copy current media to clipboard (choose link depth) or choose Copy media from the context Copy menu.
- In the Copy media modal, choose a link depth.
- Use the media count + size estimate to pick the smallest depth that still includes the visuals you need.
- Press Enter to copy media.
You should see a confirmation like:
- "Copied media to clipboard! (N media items)"
That media count is a quick sanity check that your attachments were picked up.
3) Paste into your chat (image only)
- Go to your chat tool (Smart Chat, ChatGPT, Claude, etc.).
- Click into the message box.
- Paste (Ctrl+V / Cmd+V).
What you should see:
- an image thumbnail attached in the composer (this is the compiled media bundle)
Send the message like you normally would. If the request also needs text context, paste text from Copy text separately.
What "compiled media" means
When you choose Copy media, Smart Context creates a single collage-style image that contains:
- each referenced image (screenshots, diagrams, etc.)
- each referenced PDF rendered as pages (so the model can "see" the PDF content)
The compiled image is labeled with source filenames and PDF page numbers so the visuals stay attributable and easy to reference in follow-up prompts.